This is my build log, as required by the FAA, showing that I, alone, built this airplane. Thanks for visiting my Blog!
Tuesday, January 5, 2021
Started work on the Anti-Servo Tab
Removed the tabs from the trim-tab skin. I used my tin snips to cut off the tab, but left some of it in place to do a final cleanup with file.
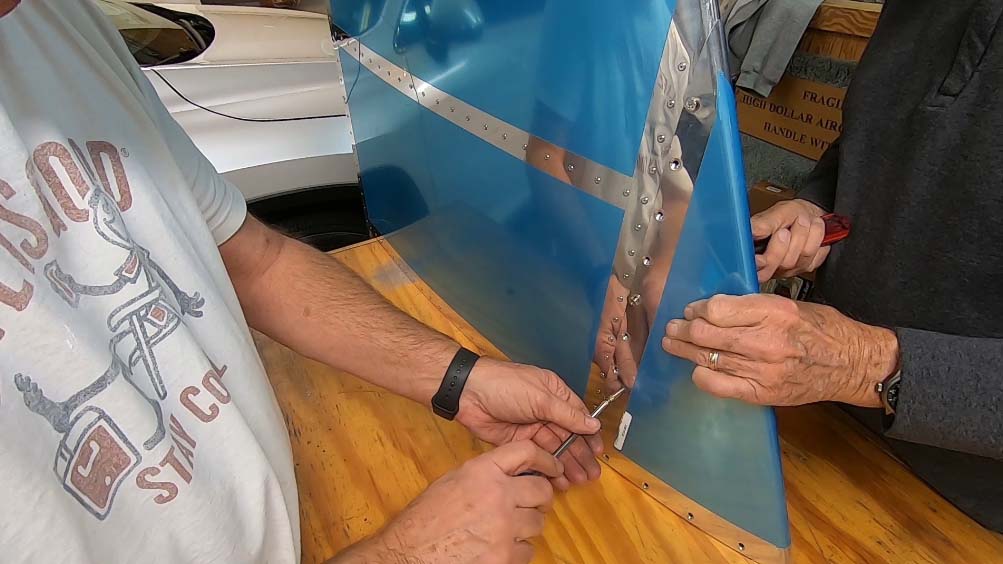
Time for blue film therapy. Soldering iron with a rounded tip and a metal ruler.
Exposed the rivet holes. Looks cool too...
Heated up the blue film in side the skin. Seems to make it a little easier to pull off.
Smoothed and sanded the edges with 320 Grit sandpaper.
Here are the spars for both trim tabs. Ready for edge sanding.
Next... Ribs! Little bitty dudes.
Clecoed the spars inside the trim tab skin. Tight fit!
Monday, January 4, 2021
Started work on the Rudder skin
Time for the cut. I used my tin snips to cut off the tab, but left some of it in place to do a final cleanup with file.
My favorite part - removing the blue stuff. This is very time consuming!
Finally! The blue stuff is out!
Now for some blue film therapy. A metal ruler and a soldering iron do the trick (and it looks cool...).
Nice look! Protects the finish as well. BTW, I rounded off the tip of the soldering iron to make sure that all it does is melt the blue film and doesn't scratch the skin.
Inserted the spar and ribs inside the skin. Now for some riveting!
Cleco, cleco, cleco.... I'm going to need more of these...
Time to rivet. These pop-rivets are so easy! Feels like cheating...
Time to rivet on the Trim Tab. I assume this will need a little adjustment later when this dude starts flying.
Thar' tis...... A thing of beauty!
Saturday, January 2, 2021
Started work on the Rudder
Started work on the Rudder. Cut out the Spar Caps for the Spar.
Separated the Hinge Brackets. These will be riveted to the Main Spar of the Rudder.
Smoothed the edges of the Hinge Brackets. This scotch-brite wheel is now on it's 2nd RV Aircraft!
Smoothed the edges of the rudder main spar. Now ready for attaching the spar caps and hinge brackets.
Positioned the Spar Caps. The Hinge Brackets will go on top of these.
Holes drilled! Ready for deburring.
Time to fit the rudder horn. It will be riveted to the rudder spar.
Final drilled the Rudder Horn to spar. Ready for riveting!
Clecoed the spar caps and hinge bracket into place. Now for the ribs!
Trail fit of the rudder spar to the vertical stabilizer. I used a tie wire to fish it in to place.
A handy tool for holding tiny washer in tight places. These are available at Aircraft Spruce.
Thursday, December 31, 2020
Started work on the Vertical Stabilizer ribs
Pealing off the Blue Stuff. Not fun, but must be done...
Trim off the front of the ribs. This is most likely to prevent outward dents in the vertical stabilizer skin when attached. I also deburred and sanded all the edges on each rib.
Crimped the outer flanges. This crimp forces the rib to straighten so it lays flat on the work bench.
Pop-riveted the front spar and ribs together. It's starting to look like something!
Smoothed the edges on the vertical stabilizer skins. Sometimes on the scotch-brite wheel, but mostly with 320 grit sandpaper.
Riveted the nutplates to the forward spar. These nutplates have screws that hold on the forward skin.
Clecoed everything together. Time for pop-rivets!
Pop-riveted everything together. So easy. Me likey!
Put on the Front Skin. This is looking really good!
Finished! Now for the Rudder!
Wednesday, December 30, 2020
Started work on the Vertical Stabilizer Rear Spar
Put the Vertical Stabilizer Hinge Assemblies Together. I used my handy pneumatic rivet squeezer to rivet this together. The pneumatic rivet squeezer make riveting much easier than the conventional hand squeezer.
Here are the upper and lower hinge assemblies. These assemblies will allow the attachment of the aircraft rudder.
Put in the upper spar cap onto the rear spar. Now, on to the lower spar cap.
Put the lower spar cap in place on the rear spar. Time for some drillin'!
Final drilled everything. I final drilled the upper and lower spar cap using the rear spar as a guide.
Riveted the spar cap to the rear sparRiveted the spar cap to the rear spar. Here's where the wedges come in handy, since I can't put in the pop rivets without them.
Wednesday, March 25, 2009
Bobs First Flight
You couldn't have asked for a more beautiful day for a first flight. Cool temperatures, blue skies and a light wind. Bob was surrounded by a throng of good friends as he pulled his aircraft out of his hangar, powered up and taxied out.
The airport was busy that day with an unusually large number of aircraft in the patttern. Bob had to hold in the taxi area for over 15 minutes, waiting for the "cleared for takeoff" transmission from the tower.
Finally he got clearance and took to the skies with a grin from ear to ear. His good friend, Andy Cown, flew his Cirrus SR22-G2 as the chase plane with Bob's wife Terri Ann on board, ready to take pictures.
All went extremely well. Bob flew his new bird well above the airport traffic pattern, checking everything out, stalls and all.
Congratulations to Bob on a first flight well done!
Smitty